Table of Contents
Installing a Wall-Mount Range Hood yourself is not only a breeze but can save you hundreds or thousands of dollars! With our easy-to-follow steps on how to install a wall-mount range hood and informational videos, you’ll have your new Range Hood up in no time!
Tools You Will Need:
- Power Drill
- Twist Drill Bits
- Reciprocating Saw
- Angle Grinder
- Grinder Blades
- Screwdriver Set
- Caulking Gun
- Tape Measurer
- Level
Materials You Will Need:
- Exterior Vent Hood
- Foam Insulation Spray
- Masking Tape
- A Magic Marker
- Screws
- Plastic Flexible Ducting (This may be included, varying from brand to brand)
- Wall Plugs (Optional)
- Safety Glasses (Recommended)
- Twist Ties (Optional for the hood's cord)
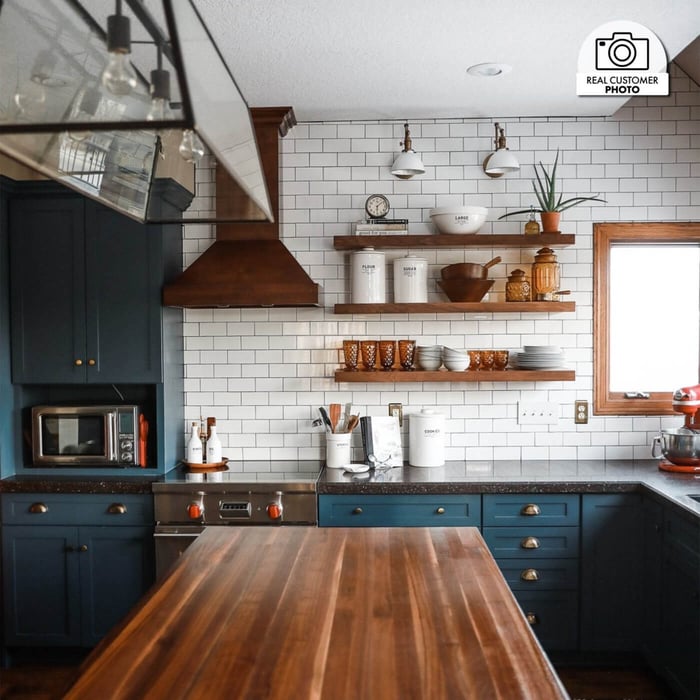
Range Hoods are becoming increasingly popular among homeowners. Not only do they increase the quality of your home, but they also increase the quality of your life! They draw smoke and steam from your kitchen, and either circulate that air outdoors or recirculate the air using charcoal filters back into your kitchen! Today, we’ll be discussing how to install a wall-mount Range Hood today, so if you’re interested in an island mount or an under-cabinet Range Hood, these steps will be quite different in reference to installation.
When shopping for Range Hoods, you may be overwhelmed by all the different styles and models, but don’t be! The main specifications you should focus on are size, style, and CFM.
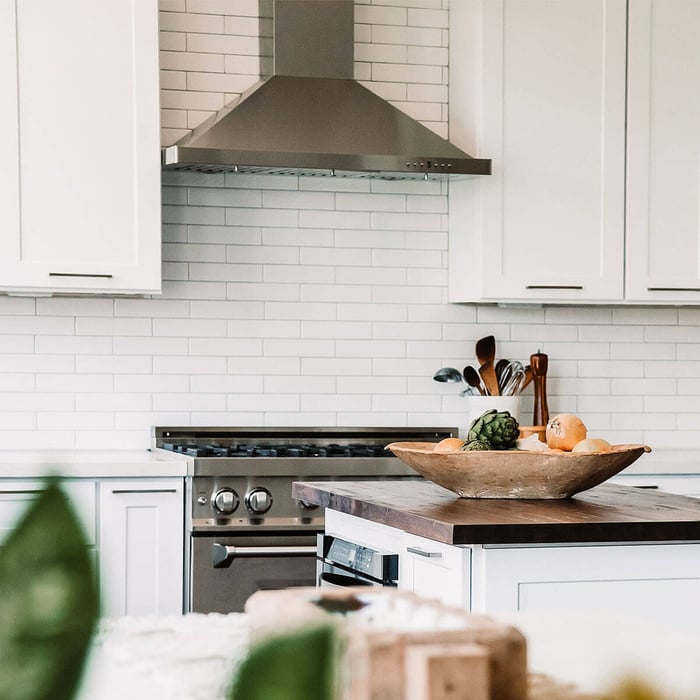
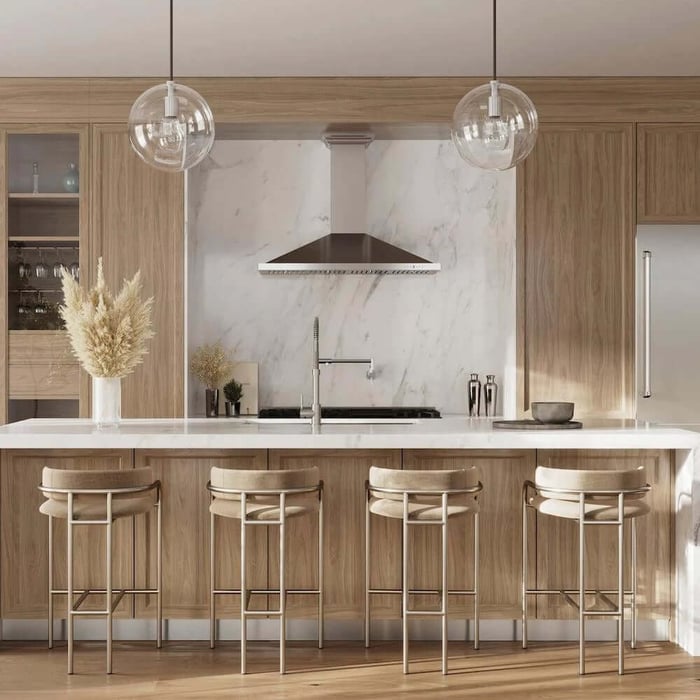
The size of your Range Hood should be the same size as your Range or slightly smaller or larger. Next, choose a style that fits your kitchen aesthetic, such as wood, stainless steel, copper, or any other style! Lastly, choose a model with a CFM that is roughly double the square footage of your kitchen.
Begin Your Measurements
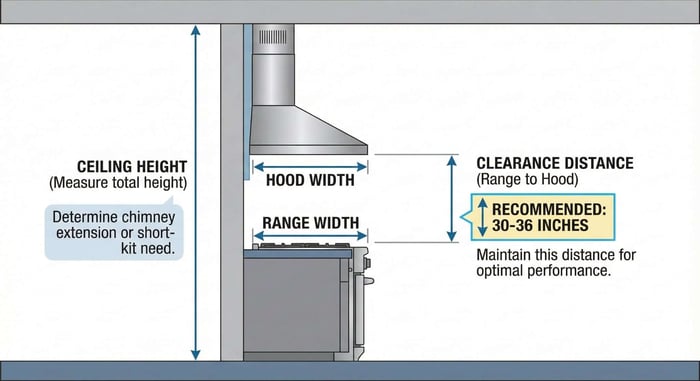
First, we recommend measuring how high your ceilings are, and how close you’d like your Range Hood to be from your Range. Knowing your ceiling height will tell you whether or not you’ll want to purchase a chimney extension or short-kit. Regarding the clearance distance between your Range and Range Hood, we recommend your hood to be within 30-36” above the top of your Range.
This informational video by ZLINE Kitchen and Bath may be helpful when doing your measurements!
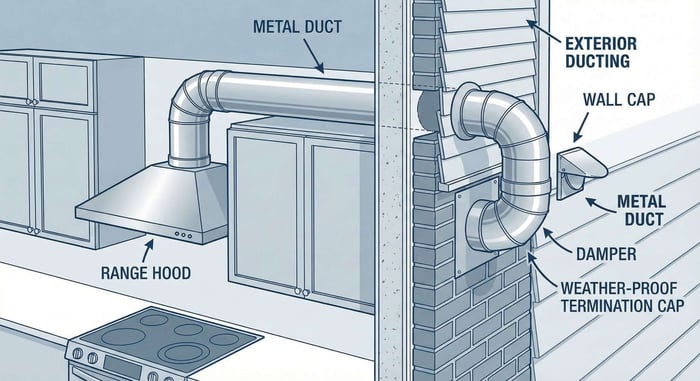
Installing Your Exterior Vent
Now that you have all the measurements necessary for the installation, we recommend following these steps to achieve an easy and efficient install! We recommend you use masking tape to make an outline of how the Range Hood will look on your wall. This doesn’t have to be exact measurements; it’s more for you to visualize how the Range Hood will look before you install it, so if you want to make any changes, you can do it before the hood is installed.
Next, you’ll want to begin your ducting installation by cutting out a hole in your wall to lead outside of your house (if you’re ducting through the ceiling, it’s best to contact a home improvement specialist to assist you). Outline the area of your steel tubing attached to your exterior vent hood with a magic marker on the inside of your kitchen. Using your drill and drill bits, drill holes through your wall until you see daylight on the other side (drill as many holes as you need, so you can easily connect the dots when you’re on the outside of the wall).
You can now start cutting out the hole using your reciprocating saw. While wearing safety glasses, go to the outside of your house and cut the circle you made with your holes as neatly as you can. Once you have your circle, place your exterior vent hood’s steel tubing through the hole. Don’t install it just yet; you’ll probably have some excess tubing extending or not enough tubing extending into your kitchen, but this is an easy fix.
If you need an extension, you can purchase it at a local hardware store and attach it with sheet metal screws and duct tape. If you need to remove excess, use your tape measure to see how much excess needs to be cut, then mark it using a magic marker. You can use your angle grinder to cut this excess. Once it’s removed, install the exterior vent hood with screws and caulk the edges and screws to stop any leaking or rusting.
Installing Your Range Hood
Now that the hard part is taken care of, you can start installing your hood! Measure the length of the drill holes at the top of the hood, and put dots on the wall centered over where your Range will sit and the hole you just cut.
Softly hammer the wall plugs into the holes and remove any excess. Using the screws provided with your Range Hood, screw them into the wall plugs, but not all the way. Now you can hang your hood from the screws and make any needed adjustments before fastening it to the wall. Once you’re happy with its positioning, you can fasten it to the wall.
Installing Your Ducting & Chimney
Use your foam insulation spray to surround the steel tubing from your exterior vent hood. Next, take your plastic flexible ducting and secure one end into the hood and the other end into the metal tubing attached to the exterior vent hood. If you need to cut this ducting, feel free to use a box cutter or Exacto knife to make a clean cut. You can now plug in your Range Hood and begin installing the chimney.
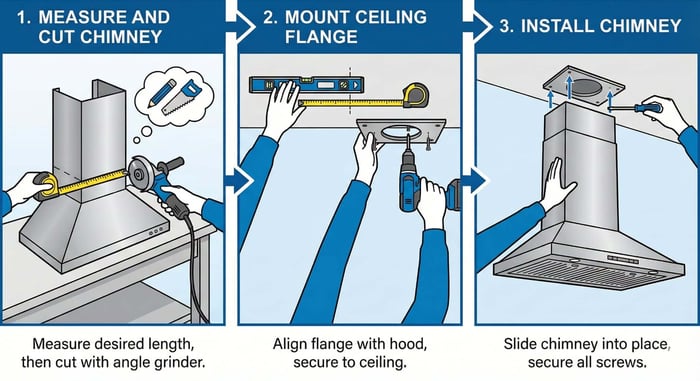
In most cases, you will have to cut your chimney to fit into the space between your hood and the ceiling. Use a measuring tape to measure the length of your desired chimney size, then cut the chimney to size using your angle grinder.
Using a level or tape measure, line up the screws you made at the top of your hood with the mounting flange given to you with your Range Hood. Screw the mounting flange to the ceiling, and slide your chimney into place. Now you can secure all the screws, and your Range Hood is installed!
Additional Information
All renovations come with different difficulties and methods of installation. This guide is designed for simple installations and can be different among different brands of hoods and home layouts.
If your kitchen doesn’t have an outlet nearby to supply power, always call an electrician to assist you in this process. You can use this video by Appliance Educator as a guide to hardwire your Range Hood!
For a step-by-step walkthrough on how to install a ZLINE Range Hood, check out this video by ZLINE on YouTube here!
We hope we were able to give you all the tools and necessary resources to teach you how to install a wall-mount Range Hood; however, if you have any questions, feel free to reach out to us on social media!
FAQs
Can I install a wall-mount range hood myself, or do I need a professional?
Many wall-mount range hoods can be installed as a DIY project if you are comfortable using basic tools and following step-by-step instructions. However, if your installation requires electrical work, ceiling ducting, or structural modifications, hiring a licensed professional is strongly recommended.
What tools are required to install a wall-mount range hood?
Common tools include a power drill, drill bits, reciprocating saw, angle grinder, screwdriver set, level, tape measure, caulking gun, and safety glasses. Having the correct tools on hand makes installation smoother and safer.
What is the proper height to mount a wall-mount range hood?
Most manufacturers recommend installing a wall-mount range hood 30 to 36 inches above the cooking surface. This height ensures effective ventilation while maintaining safe clearance for cooking.
How do I know if I need a chimney extension or short kit?
Your ceiling height determines whether a standard chimney will fit. Taller ceilings may require a chimney extension, while lower ceilings may need a short kit. Measuring your ceiling height before purchasing is essential.
What size range hood should I choose?
A wall-mount range hood should typically be the same width as your range or slightly wider. This ensures proper capture of smoke, steam, and grease produced while cooking.
What does CFM mean, and how much do I need?
CFM stands for cubic feet per minute and measures how much air the hood can move. A general guideline is to choose a hood with a CFM rating roughly double the square footage of your kitchen, though cooking style and appliance type can affect this recommendation.
Do I need to vent the range hood outside?
Ducted installation that vents air outside is the most effective option for removing smoke and odors. If exterior venting is not possible, some range hoods can be installed in a ductless configuration using charcoal filters, though performance may be reduced.
Is cutting through an exterior wall difficult?
Cutting through an exterior wall requires careful measuring and the proper tools. While many homeowners handle this step themselves, those uncomfortable with cutting exterior walls or dealing with ceiling ducting should consult a home improvement professional.
What safety precautions should I take during installation?
Always wear safety glasses, measure carefully before cutting, and avoid working near live electrical connections. If there is no nearby power outlet or hardwiring is required, an electrician should be contacted.
Can installation steps vary by brand or home layout?
Yes, installation procedures can vary depending on the range hood brand, model, and your home’s construction. Always follow the manufacturer’s installation manual in addition to general guidelines.
What should I do if my kitchen doesn’t have a power outlet for the hood?
If there is no accessible outlet, the range hood may need to be hardwired. This task should be completed by a qualified electrician to ensure safety and code compliance.
How long does it take to install a wall-mount range hood?
For a straightforward installation with existing ducting and power access, installation can often be completed in a few hours. More complex installations may take longer.
Where can I find additional installation help or videos?
Many manufacturers provide installation videos and guides online. These resources can be helpful for visual learners and for understanding brand-specific installation requirements.